The link between touch-typing and spelling

Motor-memory can often be overlooked when we are thinking of helping children and young people to spell accurately. We will work on visual activities directly intended to embed words in their memories – such as ‘look, cover, write, check,’ where pupils memorise a word, cover it up, write it out and then check their spelling – and ask questions such as, “Does it look right?” But we don’t often ask if it ‘feels’ right.

When children are first learning to read we focus on phonics for decoding, isolating the separate sounds that make up a word. We then reverse that approach to build words, often sounding out the segments and asking them how we will express that on the page. The word ‘Church,’ for instance, will become, ‘Chu, er, chu.’

So we have approaches that focus on the visual memory, and others on  the aural memory, but we often neglect to focus on the motor-memory. How a word feels as we inscribe it. It is one of the reasons for encouraging those who are struggling with spelling to use cursive – ‘joined up’ – handwriting. The theory is that instead of the word being a series of separate letters the brain needs to recollect and reproduce, it becomes one, fluent, movement. For instance, ‘heavy,’ is no longer, ‘H, E, A, V, Y’ – five elements to remember how to scribe, but ‘heavy’ one, continuous, sweep along the line.

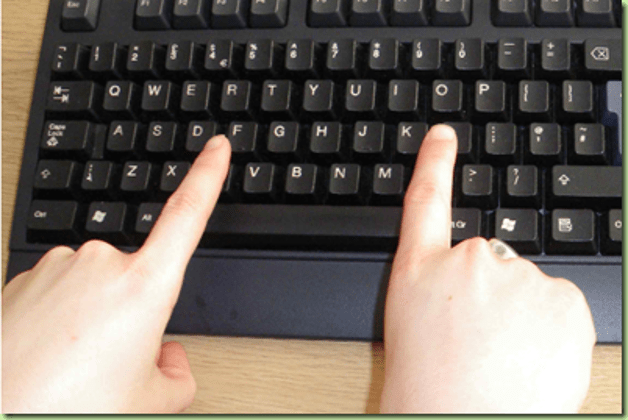
This theory has been built in to programs that teach touch-typing, so that by employing the frequent repetition necessary to learn to use the keyboard without looking at it, learners begin to put down words on the screen without having to think about the letters in them. They spell by using the memory in their movements.

One of the earliest resources to use this was Touch, Type, Read and Spell (TTRS). Originally it was a standard touch-typing course involving copying from books that differed from offerings such as those from City and Guilds, by using real words in its exercises instead of drills focused on letter groupings on the keyboard.

Then along came personal computers and approaches like Mavis Beacon Teaches Typing. Whilst it took its time, TTRS eventually went online to become www.readandspell.com . Now available for individuals to use at home, or for whole tranches of pupils to use at school, it still uses as its core vocabulary list the ever influential ‘Alpha to Omega’ spelling course, originally devised to teach dyslexic learners in the 1980s.

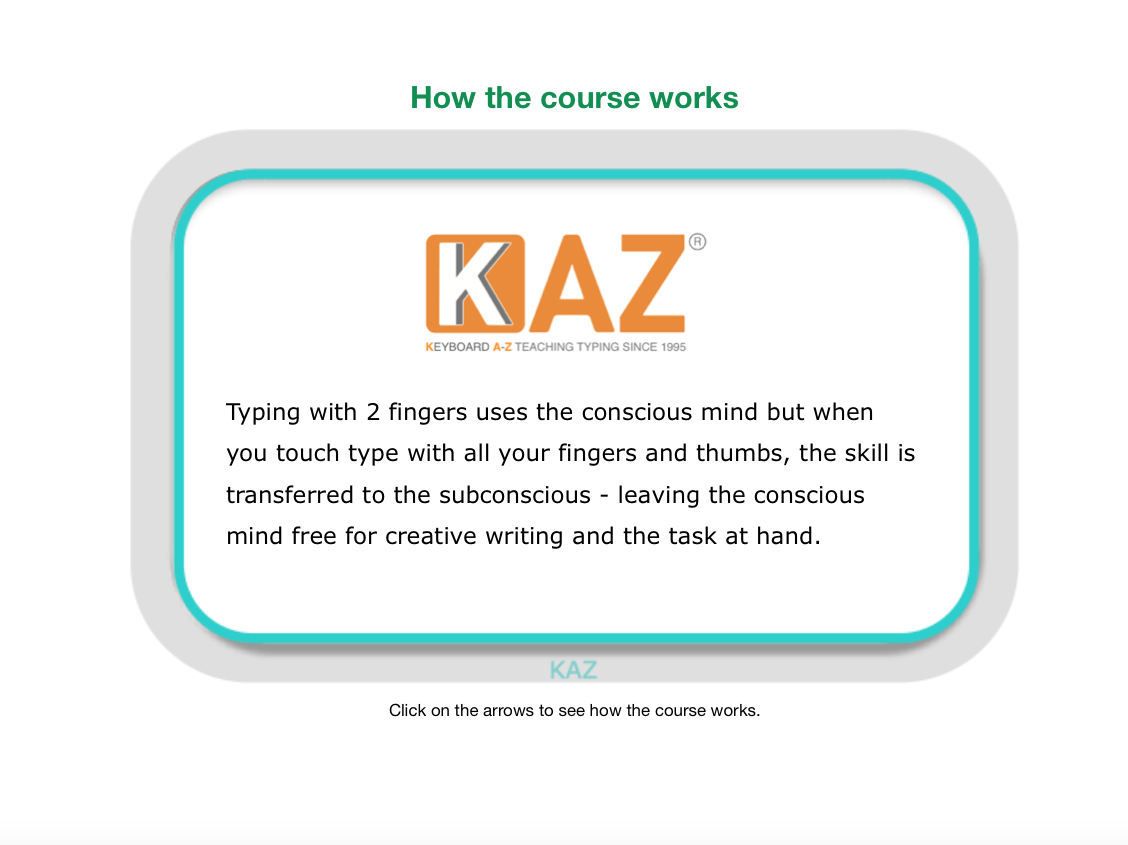
It is not the only program to do this. Kaz (www.kaz-type.com)  is a system structured i   n a similar way. Although originally targeted at general learners, it has adapted to include more specialist elements, with features such as the ability to change the font and its size, and or to select a colour scheme that a user might find easier to read on screen.

The important element of this approach to spelling, however, is keyboard fluency. As Kaz point out on their website, “Typing with 2 fingers uses the conscious mind but when you touch type with all your fingers and thumbs, the skill is transferred to the subconscious – leaving the conscious mind free for creative writing and the task at hand.”

There are compelling arguments for all children and young people to learn to touch-type. Removing barriers to their creativity, and helping them too become more productive, is just one more.

Technical Advice for SendCos

As advisory teachers we often suggest that assistive technology is available for your special needs child whenever they need or want to use it. If you’re a Senco in school it isn’t always straightforward to make this possible.

Sometimes children have exclusive use to devices, like communicators for non-verbal children; and this makes life easier.

Other times a child with special needs may have to share a device. Schools have different arrangements for making technology available to children, devices vary and are often shared with other groups, classes or individuals. Make sure you know the arrangements for keeping, charging and using laptops, chromebooks, tablets. Where are the trollies located and when are they supposed to be plugged in to charge? Is there a timetable for using them? Are there special devices available for SEND children, maybe with special software loaded? If so, where are they kept and what is the arrangement for borrowing them?

The chances are, that if you need something for children to type on, you may also need headphones. Children using a talking word processor like Clicker will need a set of headphones because they will want to be able to click on words to hear them read out and they will also benefit from hearing the audio feedback when their work is punctuated.  The audio feedback on the word processor can give them reassurance about their writing or help to edit it.  There are other pieces of software and websites  that support the child with audio feedback (Widget, Wordshark, BusyThings) Try and keep a pair of headphones nearby so that they are always available, but if you must share them, know where they are usually kept. Some children often seem to have problems with getting headphones to work. If you are told  “These headphones aren’t working” check that the computer’s volume has not been muted, or turned down very low. Some headphones have their own volume swithces, check that, and some computers have sockets for headphones at the back as well as at the front/side which may be worth trying.

There are lots of pieces of software now which allow the user to make voice notes or record their voice. (Clicker, PurpleMash, PowerPoint etc) We also recommend sometimes that children make podcasts instead of writing their work. Voice recorders are built into some devices, (iPads, Phones, etc) otherwise you can purchase voice recorders inexpensively.

Unless a child with visual impairment has specific VI software, it will help if you know how to change the resolution of your computer screen so that it’s easier for the child to see.

 It is quite easy to make an Internet page up to 500% larger. This example is for a chrome browser, but it can be done with Firefox (up to 300%) and Microsoft Edge (800%).

You can enlarge a Word document by up to 500%, an Excel document by up to 400% using the slider in the bottom right of the screen.

It is worth making friends with the ICT technician and the ICT coordinator. Sometimes you may need access to certain websites on the LGFL so it’s important to know your LGFL login details and to know who the LGFL nominated contact is for the school. LGFL nominated contacts can get LGFL logins for the children so that they can use the LGFL software at school and home, unblock websites if necessary, remind people of their passwords, obtain accounts for new staff or children. There is lots of excellent SEND software on the London Grid for Learning.

Stand and deliver


Creating accessible presentations to use in the classroom is only part of the process of teaching inclusively. Once you have created a presentation there are also things to think about when using it.

For a start it is better to stand at the board than to sit at the teacher’s desk and let the presentation take the limelight. Not only can you then use your finger to provide a focus, instead of the cursor which can be hard to follow, but also the teacher remains the centre of attention instead of just becoming a voiceover.

Sometimes the practical reason to remain seated is so you can ‘click’ for the next slide. There are ways around this. On an interactive whiteboard you can usually tap on the board, move your finger either right (as you look at the board) to move on, or left to move back, then tap again. Or you could invest in a remote ‘clicker,’ or a wireless keyboard and mouse. For a low-tech option appoint a pupil to sit at your desk and click at your bidding – one way to make sure they follow what you are saying.

When using the presentation:-

  • Take it slowly, giving the pupils time to absorb the information. It can be very difficult to read and listen at the same time  – for all of us, but especially if you have difficulties processing speech or text, or both.
  • When you open a slide pause and give time for reading before you speak. And, unless it is entirely necessary for the presentation, put up all the bullet points at once, so your audience can understand the direction of the lesson.
  • Read every slide. A practice that has helped get PowerPoint a bad name, but necessary for learners who may be struggling with the text, perhaps because of a learning difficulty, but also if they are new to English.
  • When you want the class to discuss a key point blank the screen, by pressing and then either ‘B’ for  a black screen, or ‘W’ for a white one. 

When using presentation software on the interactive whiteboard, or large screen display, in the classroom, whether that is PowerPoint, Smart Notebook, Promethean ActivInspire, or any of the many options available, bear in mind what the experience is for those on the receiving end – the children and young people in the room. These are powerful tools for teaching, and for learning, too, but we may need to give some thought about how we use them in order to get the best from them.

Inclusive teaching with PowerPoint

Much maligned  – who hasn’t suffered ‘death by PowerPoint? – but a classroom perennial, PowerPoint can be a really useful tool, but, like with all tools, it works better in the hands of a trained user. It can be a really useful tool for inclusion.

Teachers use it extensively: at  registration, for instruction, to structure lessons and help keep the pace, to introduce  each new topic, as a prelude for a visit, to give out notices, and to create personalised resources. You might also use them as a framework for activities, scrolling through automatically on the interactive whiteboard to give the class an immediate reminder, a prompt, of what they have been asked to do.

So the  first thing to be sure of is that what you are creating is accessible. Here there are three main considerations: can all pupils see it; can they understand it; is it ‘Goldilocks Compliant’ – content that is not too little, nor too much, but just right.

There are a number of things you can do to help meet those criteria;

For instance;

  • Make it plain. Don’t bother with ‘designer’ colour schemes and lots of bells and whistles.
  • Use a high contrast design, maybe with a ‘cold’ colour for a background, and a ‘warm’ colour for the font. Yellow text on a dark blue slide, for instance.
  • Keep the background plain, without effects or logos or other clutter.
  • Use a Sans Serif font, such as Arial or Comic Sans, that is at least 30 point so it can be read from the back of the class.
  • Put the text towards the top of the slide so it can be read over other pupils’ heads.
  • Use no more than six bullet points on a slide, with no more than six words in each.
  • Write in note form, you don’t need to use full sentences to get content across.
  • Use images and graphics to connect the learning, particularly symbols.
  • Be wary of using gifs and animations that might distract attention. And don’t use transitions or animated text either.
  • The presentation provides the framework to scaffold the learning on, you, the teacher, – along with the other resources you use – provide the substance.

Put simply – keep it simple. Remember, the focus of teaching and learning in the room should be the teacher, not what’s on the board, however, it may be your principle means of instruction, so you need to get the most out of it.


Soundfields – improving focus and outcomes

One of the challenges  in many classrooms, particularly in older schools, is their acoustics. Every teacher has found themselves raising their voice, even to the point of straining it, to be heard above the general chatter and hubbub of the room, even when everyone is on task.

This may be because it is a big, airy, spacious room, with parquet floors and big windows, perhaps from Victorian or Edwardian times, or even from the post-war period, with concrete walls and linoleum on the floors. They are not, generally spaces, where the focus has been on  acoustic properties and the ability of the teacher to be heard without raising their voice.

The result is that teachers struggle to be heard, and pupils find it hard to make out what they are saying, even more so if they have a hearing impairment. A Soundfield might the answer.

What is it?

Essentially it is a classroom amplification system. The teacher wears a discrete microphone and anywhere  between one and six speakers ensures that their voice is subtly enhanced. Louder, yes, but also clearer. So everyone in the room distinctly hears what is being said. Handheld microphones can also be used, perhaps for pupil contributions and questions. And, with enough speakers, any space can be catered for, regardless of size, or additional distractions, such as extractor fans in design technology or science labs.

Who is it for?

Whilst pupils with hearing impairments will undoubtedly benefit from having a better quality version of what the teacher is saying – there are also add-ins that can connect directly to hearing aids – anyone in the room can find it helpful. It means not having to strain to hear clearly, which makes it easier to focus on what is needed to be heard, without extraneous sounds, and getting information clearly and accurately the first time – meaning less need to ask peers or staff what was said, or what needs to be done.

How do I use it?

At the most basic level you plug a speaker into a socket and put a microphone on, then adjust the volume to a comfortable level. For more complex installations speakers are hung on the walls at optimum intervals and peripherals added.

When learners hear clearly they understand better, and respond more quickly and accurately. Hence, outcomes improve.

What else is there?

It is possible to get classroom amplification very cheaply. Even an 8watt speaker hung on your belt, such as a tour guide might use on a walking tour of London, can make a significant difference, and can be had for as little as twenty pounds from Amazon.

You could also use a commercial amplification system. The difference with a Soundfield is in working to ensure even sound across the space, at volume levels that are not particularly loud.

There are a few companies providing Soundfield systems. For more information try these

https://www.pcwerth.co.uk/store/soundfield-and-pa-systems

https://www.connevans.info/page/soundfield


Using Chromebooks for SEND.

Working in Tower Hamlets over the years, amongst other things, we have recommended software for PCs & laptops, apps for iPads & Android devices and more recently resources available for chrome books.

Chrome books are a budget friendly and portable computing option. They use Google Chrome operating system and are designed to be connected to the Internet. They’re an ideal choice if you use mainly browser-based apps.

Chrome books switch on quickly, automatically update and come in various sizes. Their versatility for SEND relies on useful and engaging web apps. Chromebooks have built-in accessibility options that can be adjusted to suit individual needs and have USB ports that allow a variety of assistive devices to be connected. Overall, the accessibility options are quite good, though there won’t be a solution for everybody. In addition to the built-in features of Chrome OS, the Chromebook can use Apps and Extensions to enhance access. Apps are individual, web-based programs and activities, while Extensions provide enhancements to Chrome OS working across a range of web pages and apps, in the same way that extensions add functionality to some other web browsers. Here is a guide to using Accessibility Options on chromebooks from www.callscotland.org.uk

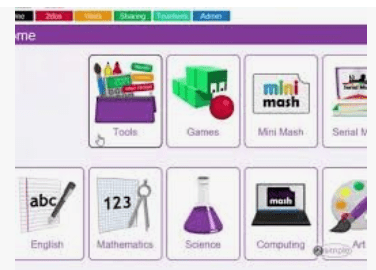
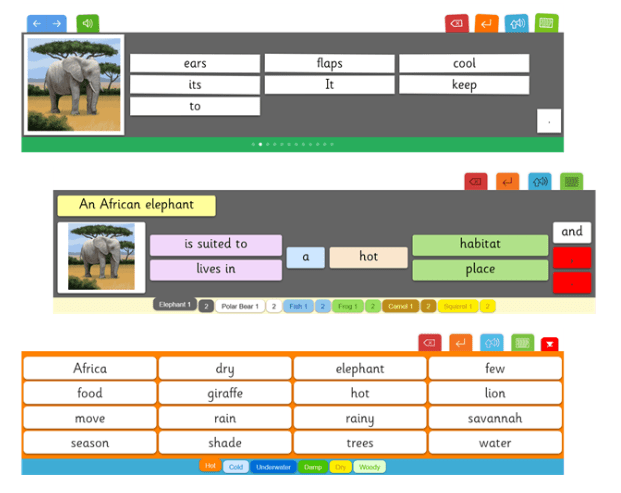
A lot of software that once had to be loaded onto networks is now available online. You can now  find Word shark online and the much-loved 2Simple software  you can now find on their online primary software suite PurpleMash.

All schools have got different systems for making devices available to children. Many schools no longer have ICT suites but use trolleys of devices that can be wheeled around to different classrooms. For ordinary curriculum purposes this is a great idea but some children (particularly those with SEND) need to have a device available to them for their exclusive use at any time.

Schools have got different systems in place for the devices made available to children with SEND. The system needs to be efficient and needs to consider the geography of the building, the whereabouts of the SEND students and keeping the devices charged and ready for use as needed. If you are using iPads and chromebooks it’s vital that your school has efficient Wi-Fi.

One of the disadvantages of a chrome book is that you cannot load special SEND software like Clicker 7 or Dragon “Naturally Speaking” onto it.  So if you have a particular need, you have to hope that there is a chromebook app or extension  that will provide for that need. As far as “speech to text” software goes (like the Dragon software) the problem is solved by Google incorporating Voice Typing as a tool on Google Docs. As far a Clicker is concerned Cricksoft have created Clicker apps for chrome books.

The Clicker apps for chrome book are the same as those for iPad however the pricing is different being. Clicker Apps for chromebook cost £30 for a years subscription for one app and then various degrees of pricing for site licenses. To find out more look at cricksoft.com/uk/clicker/chromebook

Here is a list of Chromebook apps and extensions that can be used by learners with Dyslexia


Wordshark online – an online update of an SEND perennial

What is it?

It’s hard to remember a time before Wordshark was available. If you don’t know it, it is primarily used for practice and reinforcement of spellings, particularly for those struggling with these skills, such as pupils who are dyslexic. Although it could be used by learners of all ages for the acquisition of key vocabulary.

It comes with a database of 10,000 words, all with pre-recorded speech, which can be sorted to be used in several different ways. One is the National Curriculum wordlists that pupils are expected to know as they progress through primary school. Another is Alpha to Omega, a scheme designed for those with dyslexia, and then there is the popular Letters and Sounds, or the subject specific words aimed at secondary students. You can also add your own lists if there are words you can’t find, perhaps for a particular topic.

The lists themselves are broken down into appropriate groups, such as CVC, or magic-e, and to aid learning further, words can be viewed with their phonetic make up marked, or they can be split into user-defined chunks.

Along with the wordlists are around 40 games. Once the words to be practised have been selected a number of games are recommended to use, which  can be worked through, or you can open a tab for one of the specific groups: Blend, Segment, Read, Spell, and Patterns. You can also choose specific games you want pupils to use, and assign work for them for  when they log on.

As it is web-based learners can access it from anywhere there is an internet connection, allowing for home and parent/carer involvement, too. The words can also be printed out for study away from the screen.

The whole system comes with a placement test, if you are not sure where is the best place for the pupils to get started, and a monitoring and tracking facility to see how they are getting on.

Who is it for?

The original conception was for dyslexic pupils, but it could be used by just about anyone, with primary pupils following the National Curriculum, or Letters and Sounds, lists, and secondary working on the subject specific vocabulary. With the capacity to add lists it could even become a learning resource for A Level students doing Classics who want to learn Latin or Ancient Greek.

The various approaches to spelling taken, include seeing it then typing it, finding the correct outline shape, bringing chunks together, and even speaking it aloud, all come with  a range of activities. This means that drill and practice becomes less of a chore, and even a bit of  fun.

How do I use it?

Mainly for reinforcement. To provide a range of activities presented in an interactive, varied, fun, way, that makes over-learning acceptable, rather than a drudge. Whilst it will largely be used by individuals, there is the potential to use it with a small group around the interactive whiteboard.

What else is there?

There are quite a lot of apps, programs and websites that provide different approaches to spelling. Where Wordshark differs is in the variety of approaches available, along with the flexibility to choose which wordlists to work from, or to create your own. All with the ubiquitous access the internet offers.  Flexibility, reliability, and availability, are the keywords here.

Using iPads to make a podcast using GarageBand

Make sure you have GarageBand on your iPad and it will help if you have a microphone that you can connect instead of using the built-in microphone on the iPad. (Maybe even some earbuds with a microphone that is nearer to your mouth.)

Open GarageBand on the iPad, click on the add song button (or the + sign) and select AUDIO RECORDER >  Voice. On the studio view select Narrator.
Right under the control bar (on the right) hit the + sign (Song Sections) and change it from eight bars to Automatic. Tap off the menu. In the control bar tap the wrench, tap “Metronome and Count-in“. Change it to No sound and tap off the menu. Adjust the input level (on the left side) to show as much green as possible and now you can record.

When you press Record, the ruler becomes red and moves along. Touch the stop button when you’re done recording that track.Tap the tracks view icon on the control bar to listen to your track.  Press play to preview and move the play head around to listen to different parts of your track if you need to.

(To add another track press the + on the bottom left of the screen. If you need to record your voice again choose “narrator” and check that the settings are as they were before.)

When editing you can move the tracks around by touching them and sliding them with one finger and if you want to zoom into the track you put two fingers on the screen and pinch them apart.

To see more options for different parts of the track you can double tap on the track and a menu option comes up which includes Split. If you swipe down somewhere on your timeline it will split the track. The yellow bars on the end of each region allow you to trim the ends of each of the recordings.

You can add music tunes as a background tracks. There are some built-in to GarageBand but it is possible to import your own tunes. Choose another track with the same settings then choose the Loops icon on the control bar and choose Audio Files, and drag in the audio file that you want.

To edit the music, slide the side bar (next to the track) over to the left to show the title of the track, the solo & mute buttons,  the metre and the volume.

Tap the microphone icon  and select Automation. On the top left of the screen slide the pencil over until the button is red. Click on the timeline to create automation points to create slight raises or decreases in the volume. When done slide the pencil to lock the automation points.

Listen to the entire episode to make sure you don’t need to do any more editing and then you can share your track. It will save into the “My Songs” folder. It saves as an .m4a file and so can be loaded onto Podcast Central on the London Grid for Learning.


Go Talk Now (lite) an easy start for AAC

What is it?

One of the simplest electronic communication aids – so-called augmentative and alternative communication (AAC) – is the Go Talk. A physical device with a set number of squares in a grid that when pressed played a recorded message. They come in various sizes, and each can be loaded with a number of set ups which are then associated with an overlay to guide the user.

It is a system that has now been made into an iPad app which has retained much of that simplicity.

To get you started there is a no-cost ‘Lite’ version which is restricted to six pages, but within that these can include an on-screen keyboard, grids to build complete sentences, or single word responses. The grids can range in size from 1 to 36 cells, any and each of which can contain both text and images, or just either, and the option to speak either the words shown, or a recorded sentence, as well as switching to another page.

This flexibility means it can be used by those who can read, and by those who need images or symbols, and everyone in between.

Who is it for?

Anyone who needs a voice. This might be a child or young person with an autistic spectrum condition who is non-verbal, or else someone with a speech and language condition that makes their words indistinct, or even a learner with profound and multiple learning difficulties who is given two options to make a choice for what they want to drink.

It could be used by an individual, or shared and passed around a group, perhaps to build new vocabulary, or to rehearse language for social situations.

How do I use it?

The simplicity and flexibility of the set up mean that it can be used in myriad ways. It could be given to a learner to take everywhere to literally be their voice – whether that is in class, out in the playground, and even when they go home or go to the shops. It might also be a way for a pupil to join in a lesson. Grids with appropriate answers can be prepared so that he or she can answer teachers questions, or make choices about what is happening in the lesson, or maybe to give them options for what they want to do next.

For instance, a grid of numbers will allow them to join in  a mental maths lesson. Initial letters might help with phonics, and adjectives with descriptive writing. It is also a useful assessment tool, both for literacy itself to ascertain reading levels as they read words to complete activities, or to assess understanding of what has been learnt.

What else is there?

There are a number of great  communication apps on the  market, such as Proloquo2go, Grid Player, and Clicker Communicator, all offering similar features. What distinguishes Go Talk Now (Lite) is that it can be downloaded and installed for free, albeit limited to six pages, then quickly edited and expanded. Whilst Grid Player is also free, you need to invest in  Grid 2 to edit and create pages.

Because of its easy availability Go Talk Now is an easy point of entry into AAC.

Independent learning through technology

Aran is ten. He was a normally developing child until the age of six when he had a major medical event which required life saving surgery, but which left him brain damaged. He spent a year in hospital then a year in a rehabilitation centre before going back into a mainstream school at the age of eight.

His life has changed considerably. Previously he was meeting age related expectations, and no concerns were expressed about his learning needs or language development. He is now in a powered wheelchair, with his  only assured movement in his left arm. His speech and language are also seriously affected. It is as if, at his young age, he has had a stroke.

When he first went back to school his communication was single words, and consideration was given to providing an augmentative and alternative communication aid (AAC) such as an iPad loaded with Prologquo2go. This is a simple, on-screen, grid from which the user selects the word or phrase they want to say. Frequently the grid will have symbols in the cells as many users will have literacy difficulties, and this can speed up word finding. Unfortunately he did not have sufficient muscle tone in his arm to be able to lift it far enough to touch all of the screen, nor the ability to isolate a single finger to tap or to swipe. This also meant that using an iPad was out for curriculum work.

We decided to find another way of working, whilst at the same time using the iPad for games and activities that might help build his capacity to use it more effectively in the  future.

We began to introduce a laptop with a switch attached. This is a large button that is pressed to create a response on the screen. At first we tried simple activities where a picture is built with each click of the button, which then became animated after five clicks as a reward. Aran picked this  up very quickly and was soon using  ChoooseIt Maker Readymades for curriculum activities. These are a number of sequential screens, each with a set of cells  – between two and eight – laid out like a grid, containing possible answers to a question (which can be written, read aloud, or both). Each cell is highlighted in turn and when it gets to the answer the user presses the button.

Fairly quickly we were able to add a second switch meaning that  instead of automatic scanning one button moved the highlight on the screen whilst the other was used to select the chosen answer. This set up meant that Aran was able to work independently for the first time since he had returned to a classroom, to the extent that his teaching assistant could leave him to work whilst she nipped to the loo, grabbed a cup of tea, or worked with one of the other  children in the class.

We also invested in ChooseIt Maker3 so that we could create more challenging material for him to use in class.

It is difficult to know how much he is remembering from what he learnt previously, before he became ill, or whether he is learning afresh. Similarly with his language development, some of it may be recovered, some learnt. However, his speed of recovery, whilst slow, is continuing – and gaining – apace.

He is now using two switches with the on-screen keyboard and predictor in Clicker7 to write short pieces of work, as well as using three switches to control his wheelchair. His language is such that he is using sentences of several words, although AAC is sometimes used to help him express his feelings when in counselling sessions (provided to help him make sense of the situation he now finds himself in).

Whilst it is impossible to know where his developmental path will take him, it is clear that without technology he could not operate with any independence in school. It allows him to get himself around, to work and to write, as well as contributing to his growing capacity to communicate.