
 Make sure you have GarageBand on your iPad and it will help if you have a microphone that you can connect instead of using the built-in microphone on the iPad. (Maybe even some earbuds with a microphone that is nearer to your mouth.)
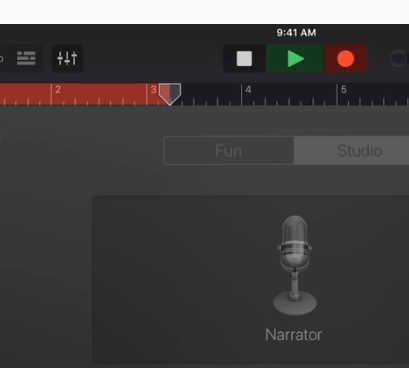
 Open GarageBand on the iPad, click on the add song button (or the + sign) and select AUDIO RECORDER > Voice. On the studio view select Narrator.
Right under the control bar (on the right) hit the + sign (Song Sections) and change it from eight bars to Automatic. Tap off the menu. In the control bar tap the wrench, tap “Metronome and Count-in“. Change it to No sound and tap off the menu. Adjust the input level (on the left side) to show as much green as possible and now you can record.
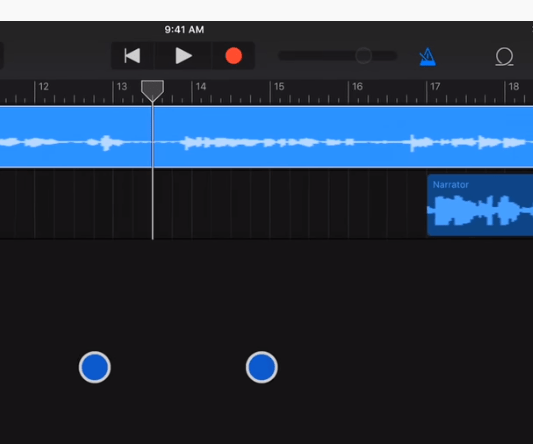
 When you press Record, the ruler becomes red and moves along. Touch the stop button when you’re done recording that track.Tap the tracks view icon on the control bar to listen to your track. Press play to preview and move the play head around to listen to different parts of your track if you need to.
(To add another track press the + on the bottom left of the screen. If you need to record your voice again choose “narrator” and check that the settings are as they were before.)
 When editing you can move the tracks around by touching them and sliding them with one finger and if you want to zoom into the track you put two fingers on the screen and pinch them apart.
To see more options for different parts of the track you can double tap on the track and a menu option comes up which includes Split. If you swipe down somewhere on your timeline it will split the track. The yellow bars on the end of each region allow you to trim the ends of each of the recordings.
 You can add music tunes as a background tracks. There are some built-in to GarageBand but it is possible to import your own tunes. Choose another track with the same settings then choose the Loops icon on the control bar and choose Audio Files, and drag in the audio file that you want.
To edit the music, slide the side bar (next to the track) over to the left to show the title of the track, the solo & mute buttons, the metre and the volume.
 Tap the microphone icon and select Automation. On the top left of the screen slide the pencil over until the button is red. Click on the timeline to create automation points to create slight raises or decreases in the volume. When done slide the pencil to lock the automation points.
Listen to the entire episode to make sure you don’t need to do any more editing and then you can share your track. It will save into the “My Songs” folder. It saves as an .m4a file and so can be loaded onto Podcast Central on the London Grid for Learning.


